Letting your user change the color of the theme can be a hassle, or downright scary. The color module built into Drupal 8 core allows administrators to change the color scheme of compatible themes. We are going to walk through the few steps that are required to get your custom theme up and running with the color module.
Possible Use Cases
- Creating a theme that needs to work for multiple sites with different color schemes.
- Creating a theme to contribute or resell.
What You Need
- A Custom Theme
- Install the Color Module (included in core)
Setting up your Theme
Once you have created your theme you will need to create the directory color and create at least one file named color.inc. There are more files that can be put here to make the preview for the admins better but they are not essential for this tutorial.
You will also need a CSS file with all of your color things that you are letting the admins control with Drupal.
Your directory structure should look like the following example. Where your CSS file is and what it is named isn’t a requirement of the Color Module, but you do need to properly link to them.
custom_theme
| -- custom_theme.info.yml
| -- custom_theme.libraries.yml
| -- color
|    |-- color.inc
| -- dist
|    |-- css
|        |-- color.css
The custom_theme.info.yml is a requirement of every theme, and the only thing worth mentioning here is that it must have a library that it is using so you can pull in your CSS changes. It should look like the following. I am sub-theming Bartik just for this sample, as it looks decent as a base to not have to write any extra HTML or CSS for this tutorial, and is not required.
name: Custom Theme
type: theme
description: Custom Theme to show color module
package: Other
core: 8.x
base theme: bartik
libraries:
- custom_theme/color
The custom_theme.libraries.yml is needed to give the path to your CSS that the Color Module will be using. It should look like the following:
color:
  css:
    theme:
      dist/css/color.css: {}
The color.inc is the file that is doing all of the work, a minimum file would be like the following:
$info = [
  // Available colors and color labels used in theme.
  'fields' =--> [
    'primary' => t('Primary Color'),
    'secondary' => t('Secondary Color'),
    'text' => t('Text Color'),
    'background' => t('Background Color')
  ],
  // Pre-defined color schemes.
  'schemes' => [
    'default' => [
      'title' => t('Default'),
      'colors' => [
        'primary' => '#3f51b5',
        'secondary' => '#536dfe',
        'text' => '#3b3b3b',
        'background' => '#ffffff'
      ],
    ],
    'red' => [
      'title' => t('Red'),
      'colors' => [
        'primary' => '#f44336',
        'secondary' => '#ffcdd2',
        'text' => '#600000',
        'background' => '#ffffff'
      ]
    ]
  ]
];

// CSS files (excluding @import) to rewrite with new color scheme.
$info['css'] = ['dist/css/color.css'];
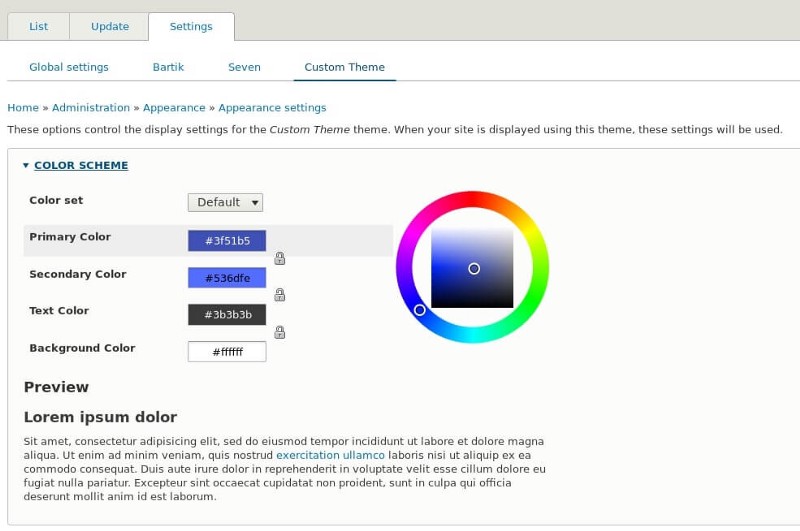
Once that file is there you can clear your site’s cache and go to the theme settings for your site /admin/appearance/settings/custom_theme and you will see the color form. The form should have all of the fields you defined and show a color wheel allowing people to pick whatever color they’d like for the form.

Now admins can choose whatever colors they want, or from one of your pre-created schemes. If you change those and view the site, you will see that has happened yet. The next step needed is to create the CSS that Drupal will actually be using to color the site with the values entered in the admin form.
Setting Up Your CSS
There are, in my opinion, two approaches to how you could setup your CSS file to color your site.
- Create color classes that you apply to your HTML as needed that color things
.primary_color { color: #3f51b5; } .primary_color_bg { background-color: #3f51b5 } - Take all of the selectors that need colors and move those into your CSS file.
#header {
  background-color: #3ft1b5;
}
I personally think the first approach is much cleaner and will save you time and headaches, but in this example I’m doing the second approach for simplicity. Below is what our dist/css/color.css file looks like.
#header {
  background-image: none;
  background-color: #3f51b5;
}

h1 {
  color: #536dfe;
}

body {
  color: #3b3b3b;
  background-color: #ffffff;
}

#page {
  background-color: #ffffff;
}
Something very important that you should take note of is how colors in your CSS map to the colors in the admin form. In Drupal 8 we are grabbing the HEX defined as the default in your color.inc and replacing that with the new value saved in the config form. In our default scheme, primary color is set to #3f51b5 so in our color.css file anywhere that hex exists, it will get overridden to be the new primary color set in the admin interface.
Results
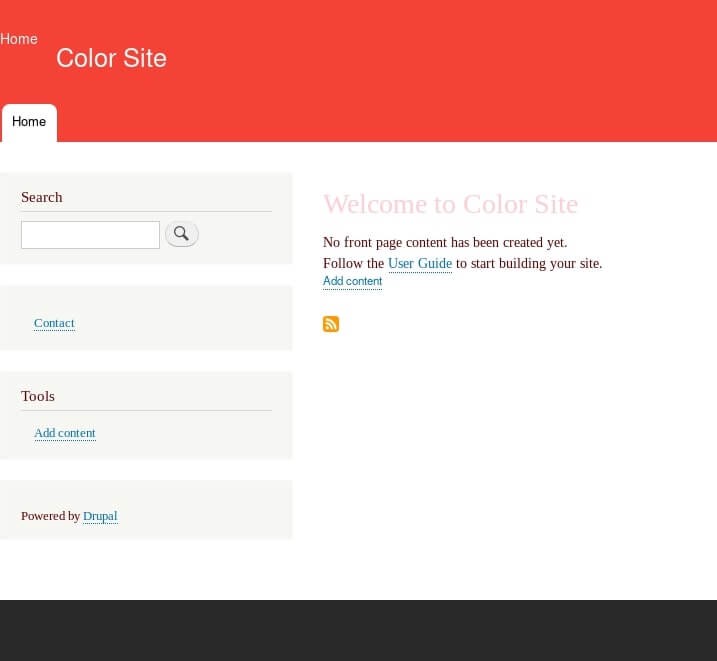
Now that everything is setup, we are good to go to the admin interface again and change the color scheme. Once changed to the red scheme, if we reload the home page this is what it looks like:

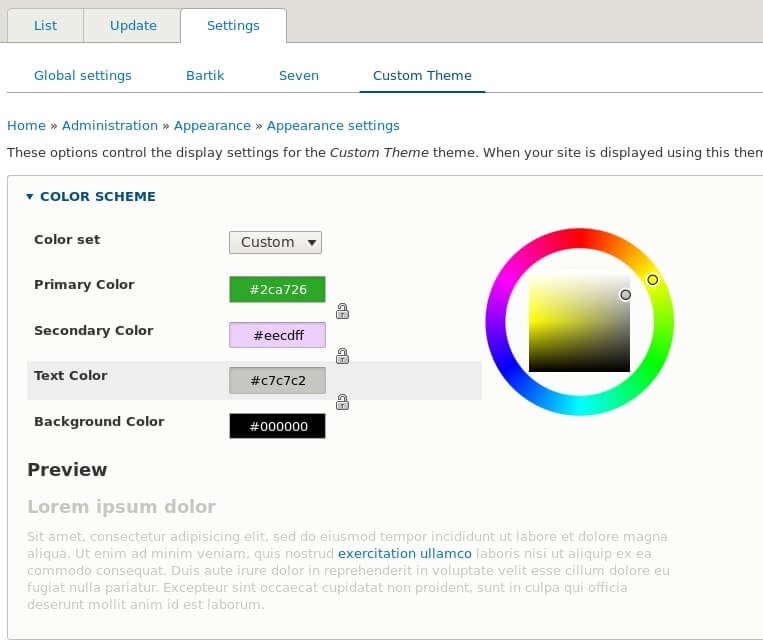
We can also head back into the theme settings and choose completely custom colors, disregarding predefined color schemes.

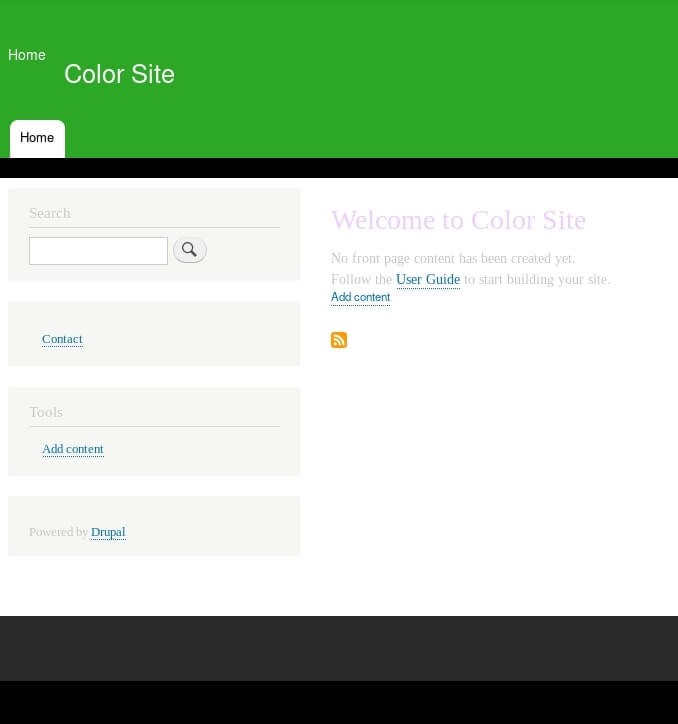
Once we save that and head back to the homepage, we’re greeted by this very ugly site.

This obviously isn’t the ideal situation, and you should be able to create much better looking sites if you contact a designer to create your color schemes and consider what elements should allow color changes.
Quirks you might run into
- If you added keys in the color.inc but you don’t see them in the theme settings form even after a cache clear you must clear out the color.theme.custom_theme config. You can do that with a drush command drush cdel color.theme.custom_theme
- This seems weird, but for me I had to make my HEX values in both my color.inc and my color.css lowercase or they didn’t get overridden.
Conclusion
The Color Module just works, is simple to set up, and is a great tool to know how to use. At Code Koalas we have used it on a multiple sites for clients and will continue to use it when it is appropriate for the project.